Use BBC micro:bit to publish messages
Before programming and publishing messages to MakerCloud, users must first connect micro:bit to MakerCloud via MQTT. For instructions, refer to the following link:
Using BBC micro:bit to connect to MakerCloud
KittenWiFi
Even if you use different micro:bit expansion boards, they can use the same program blocks to program and publish messages as long as they are successfully connected to MakerCloud. The following uses Armour:bit as a demonstration. Note that each program must initially connect to Wi-Fi and MakerCloud MQTT.
publish message blocks
In the MakerCloud extension, there are different types of publishing program blocks, depending on the data type that is being sent.
Publishing a text message

Publishes a text message to a topic via KittenWiFi on MakerCloud
Publish a key text message

Publishes a key text message to a topic via KittenWiFi on MakerCloud
Publish a key-value pair message

Publishes a key-value message to a topic via KittenWiFi on MakerCloud, which automatically creates a corresponding line chart on MakerCloud
Publishing latitude and longitude data points

Publish a latitude and longitude message to a topic via KittenWiFi on MakerCloud
Publishing a text message
Learning Focus
- Learn how to publish text messages to a topic on MakerCloud via KittenWiFi
Exercise: Say hello to MakerCloud
Goal:
When you press "A" on your micro:bit, it will publish the text message "hello" to a topic on MakerCloud.

Preparation on MakerCloud:
- Create a project
- Create a topic
Programming on MakeCode:
- Create a project
- Add the MakerCloud KittenWiFi extension: https://github.com/scaleinnotech/pxt-makercloud-V2
- On start: Update armour:bit port, connect WiFi and MakerCloud MQTT
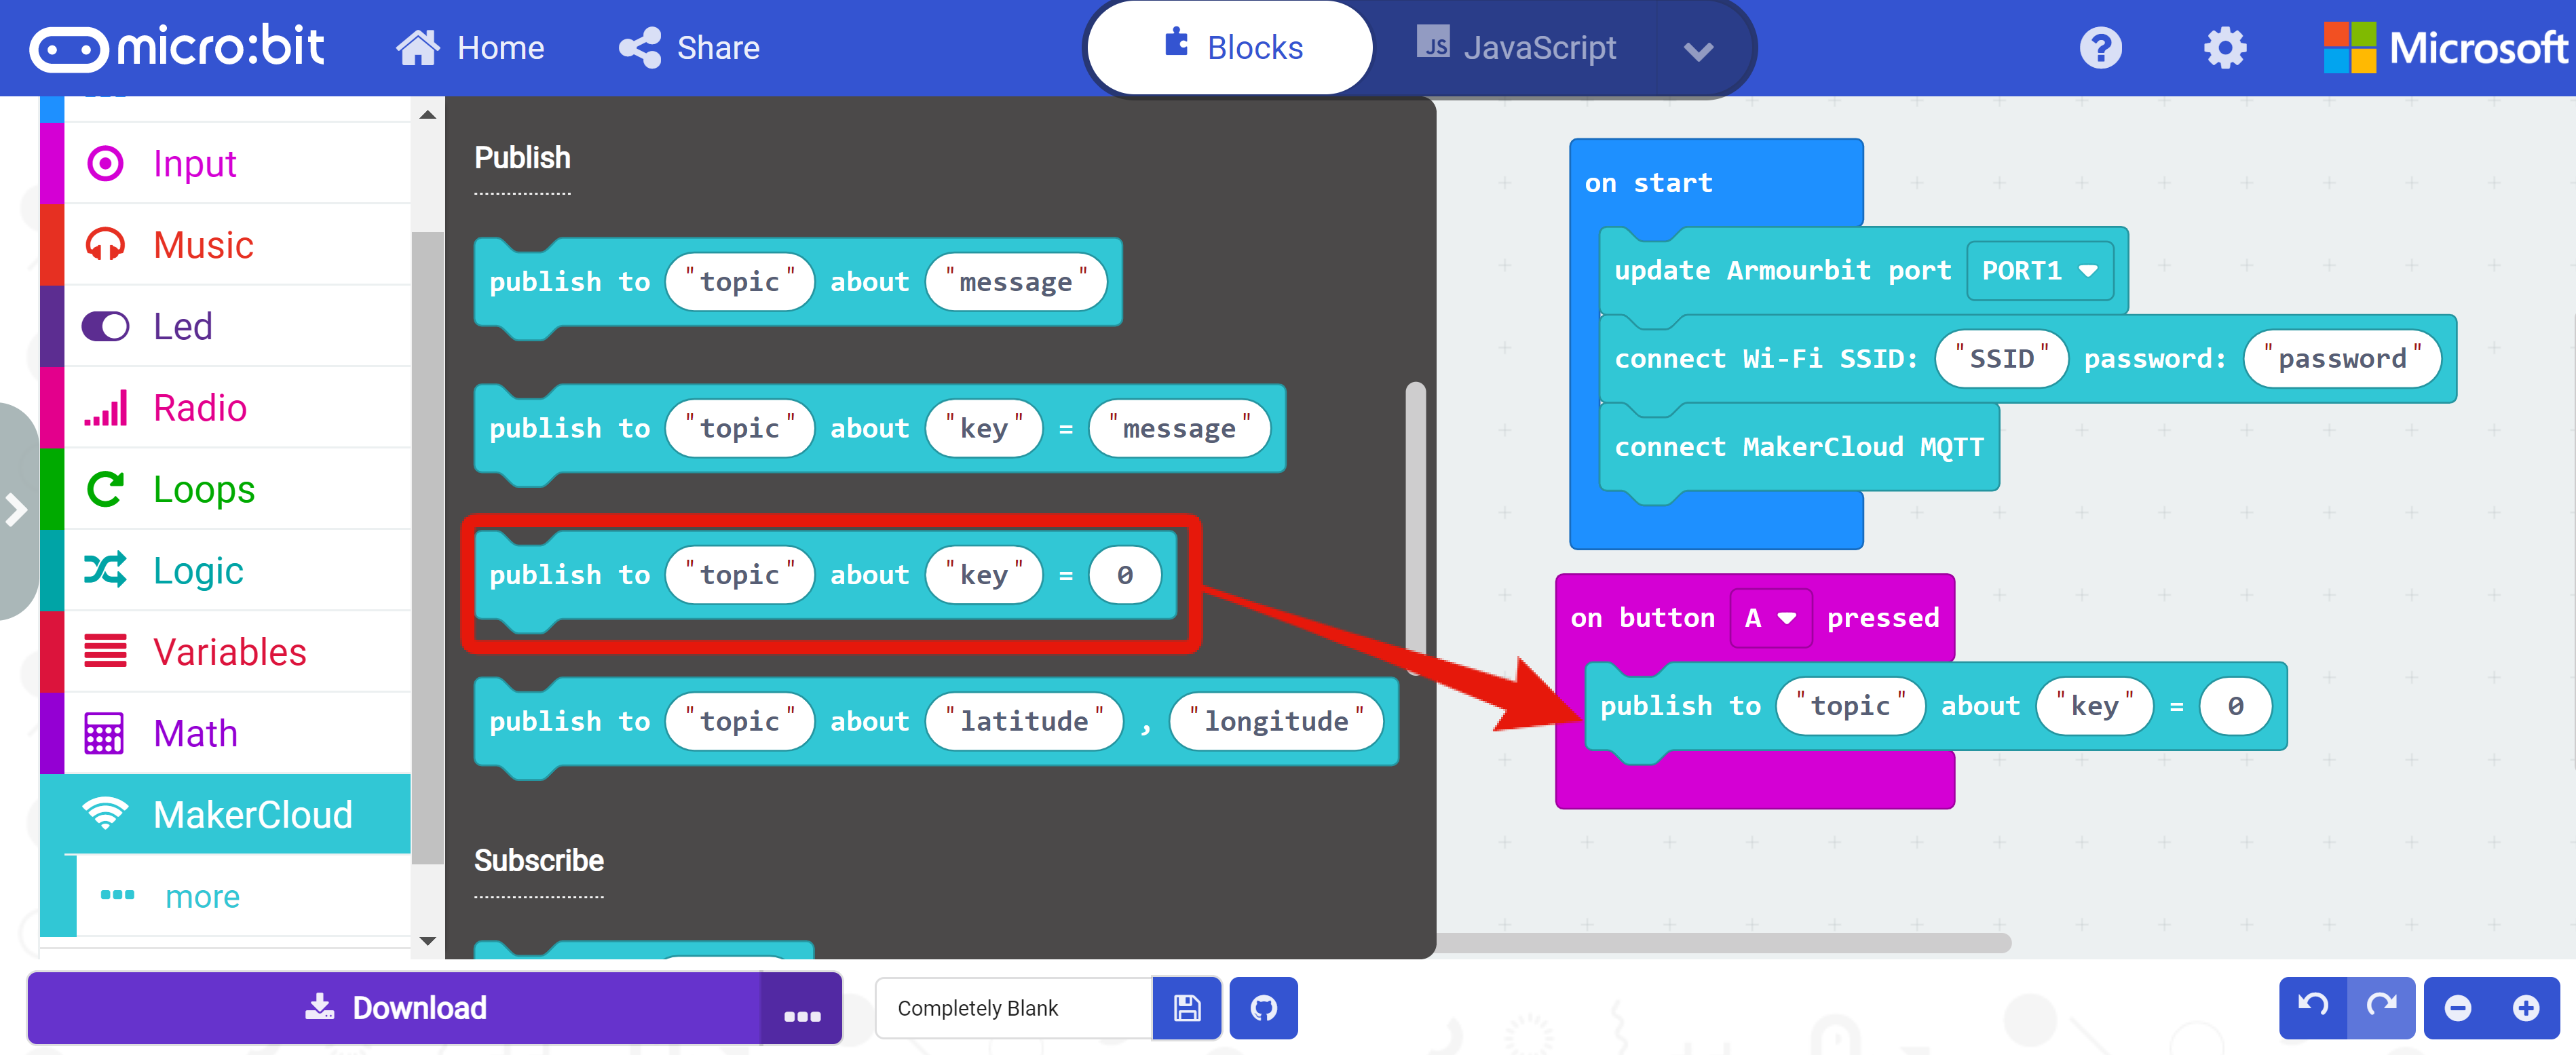
- When button "A" is pressed: Publish a text message
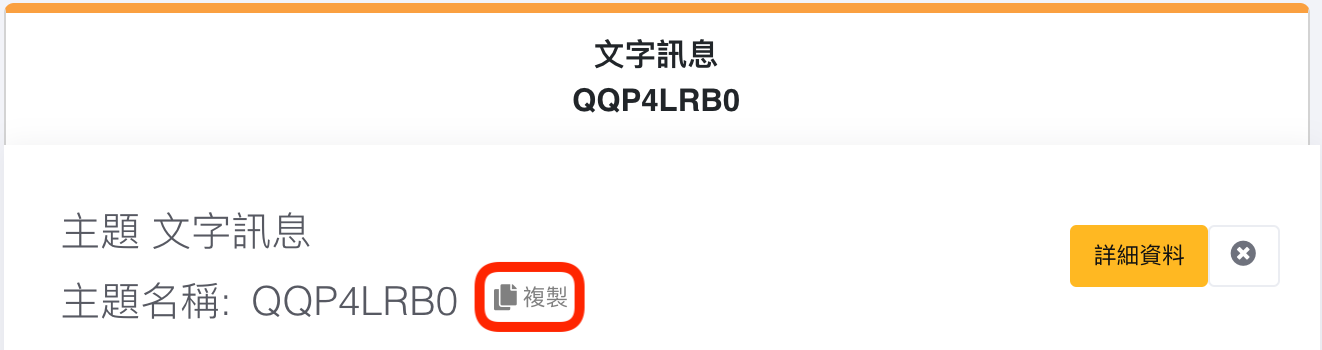
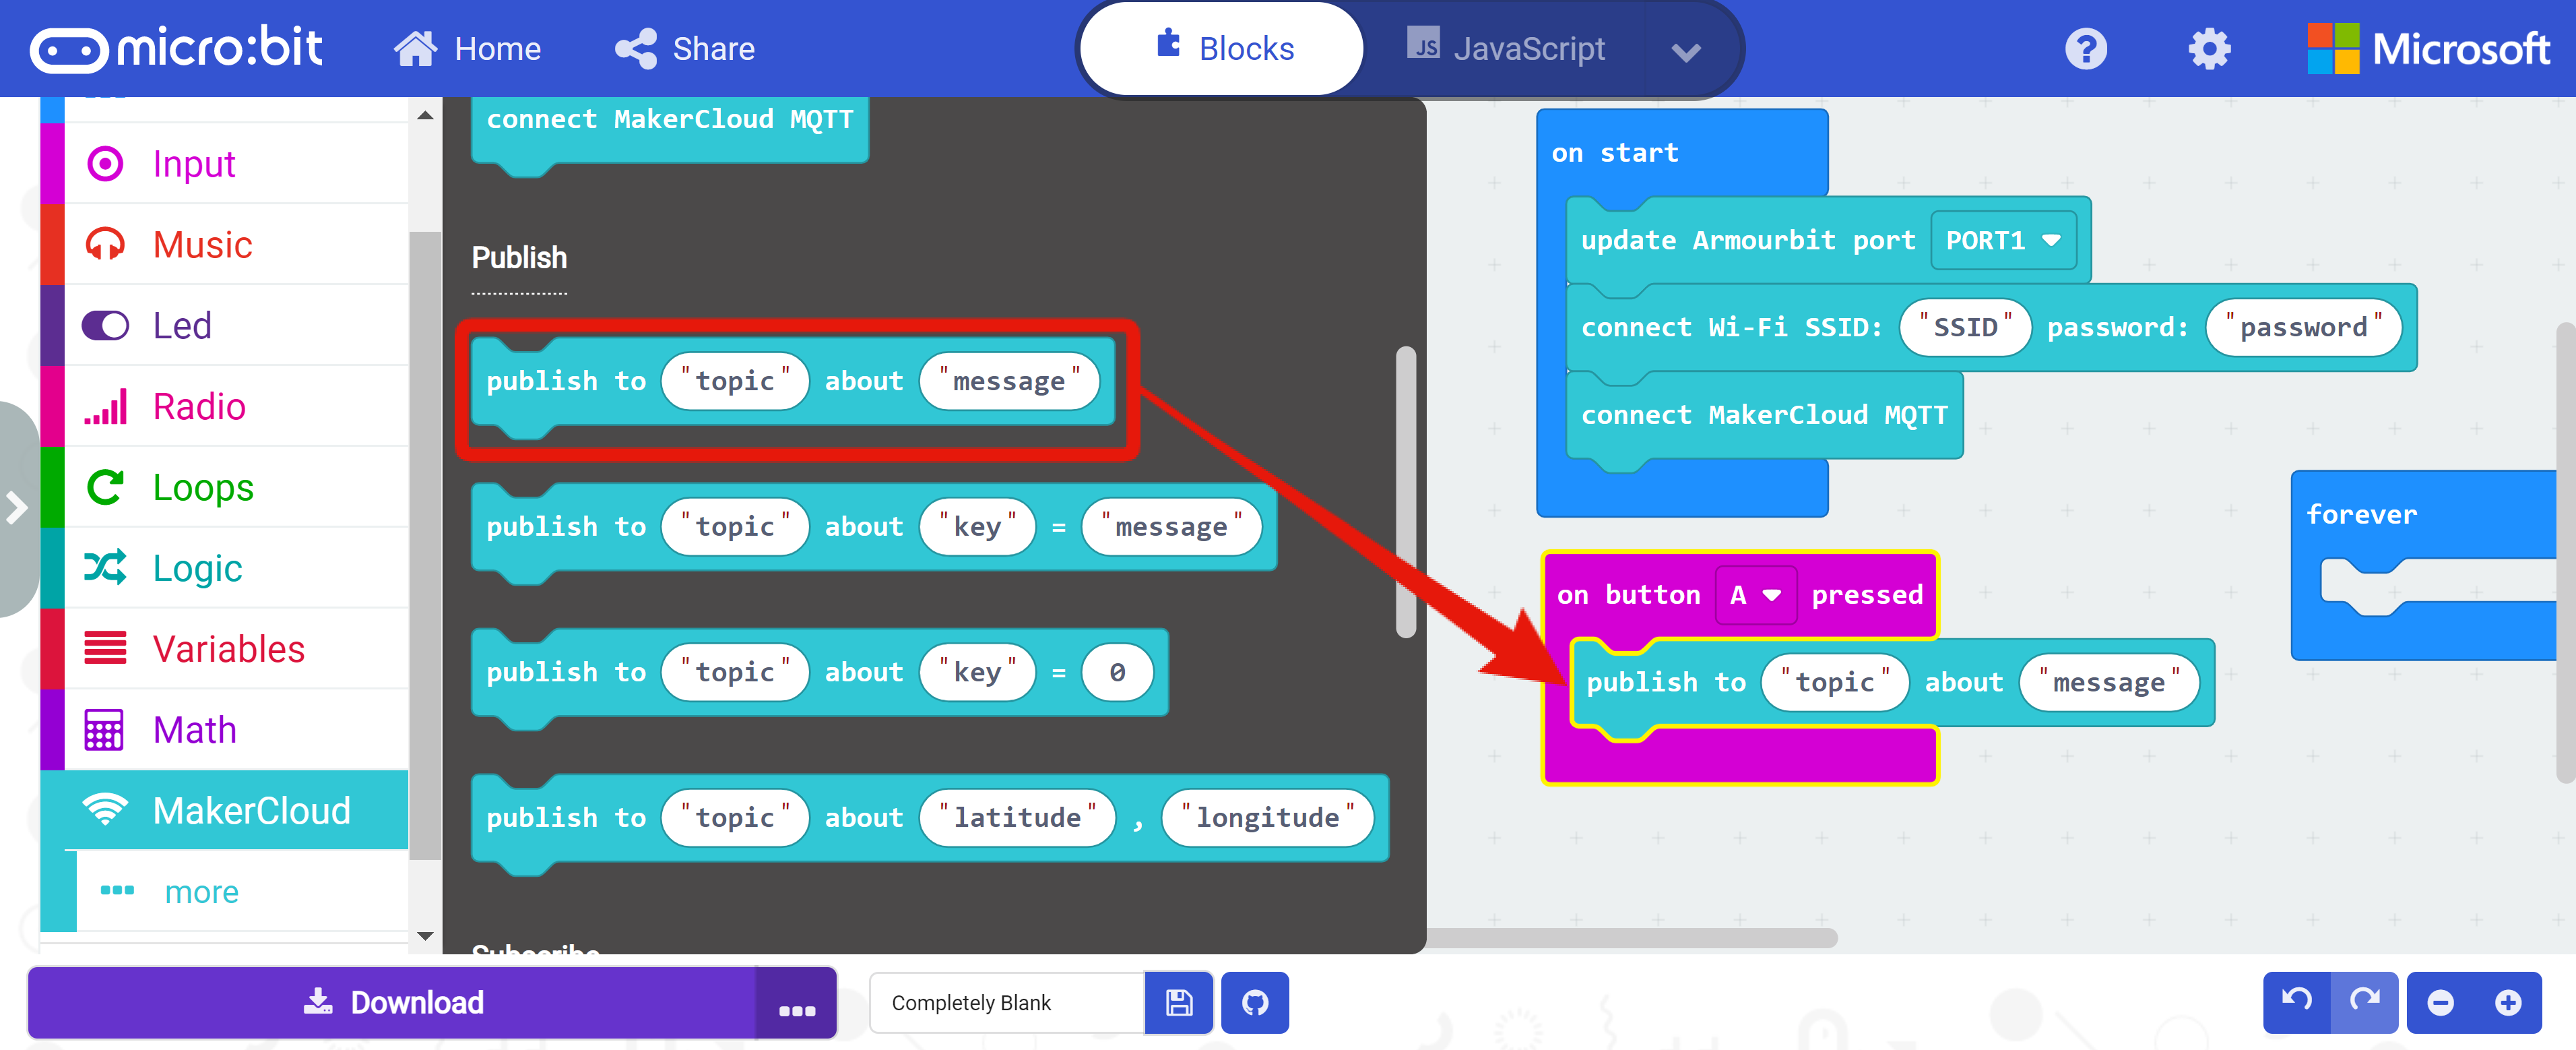 5. Copy the topic name in MakerCloud
- Paste in the "topic" of the publish text message block
- Enter "hello" in "message"
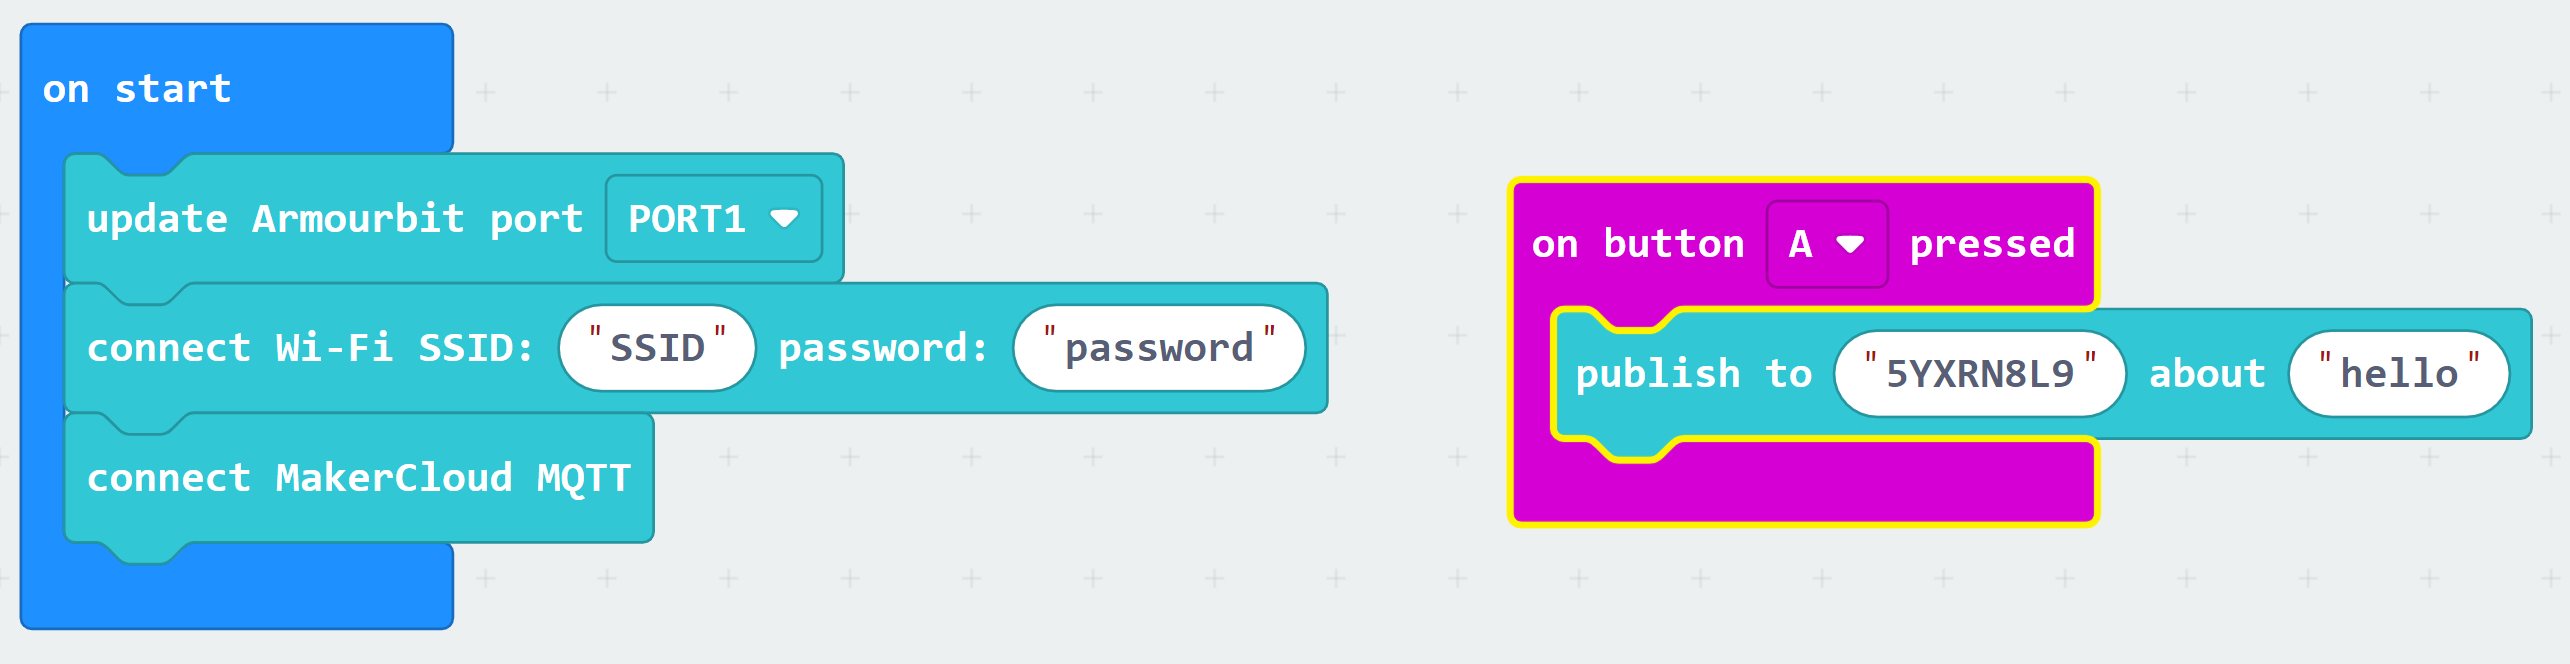 8. Download the program to your micro:bit
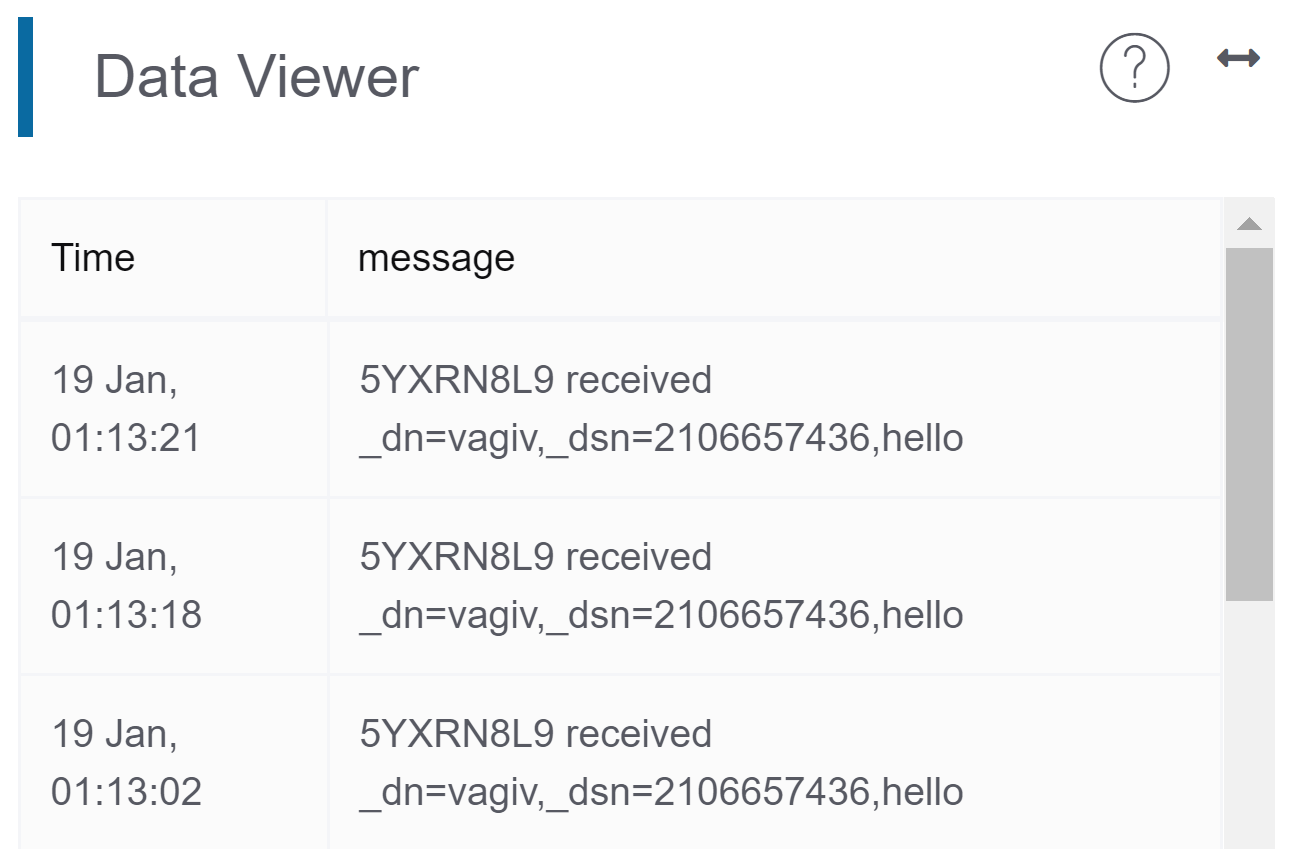
When finished, return to your project homepage on MakerCloud. After pressing A on your micro:bit, you should see the text messages sent from your micro:bit in the real-time data viewer.
Publishing a key-value pair message
Learning Focus
- Learn how to publish key-value pairs to a MakerCloud topic via KittenWiFi
- Learn to create a line graph on MakerCloud to display and record key-value pair messages
Exercise: publish random numbers
Goals
- When you press A on your micro:bit, the micro:bit will publish a key-value pair message (a random number value) on MakerCloud
- Create a line graph on MakerCloud to display and record key-value pairs

Preparation on MakerCloud:
- Create a project
- Create a topic
Programming on MakeCode:
- Create a project
- Add the MakerCloud KittenWiFi extension: https://github.com/scaleinnotech/pxt-makercloud-V2
- On start: Update armourbit port, connect WiFi and MakerCloud MQTT
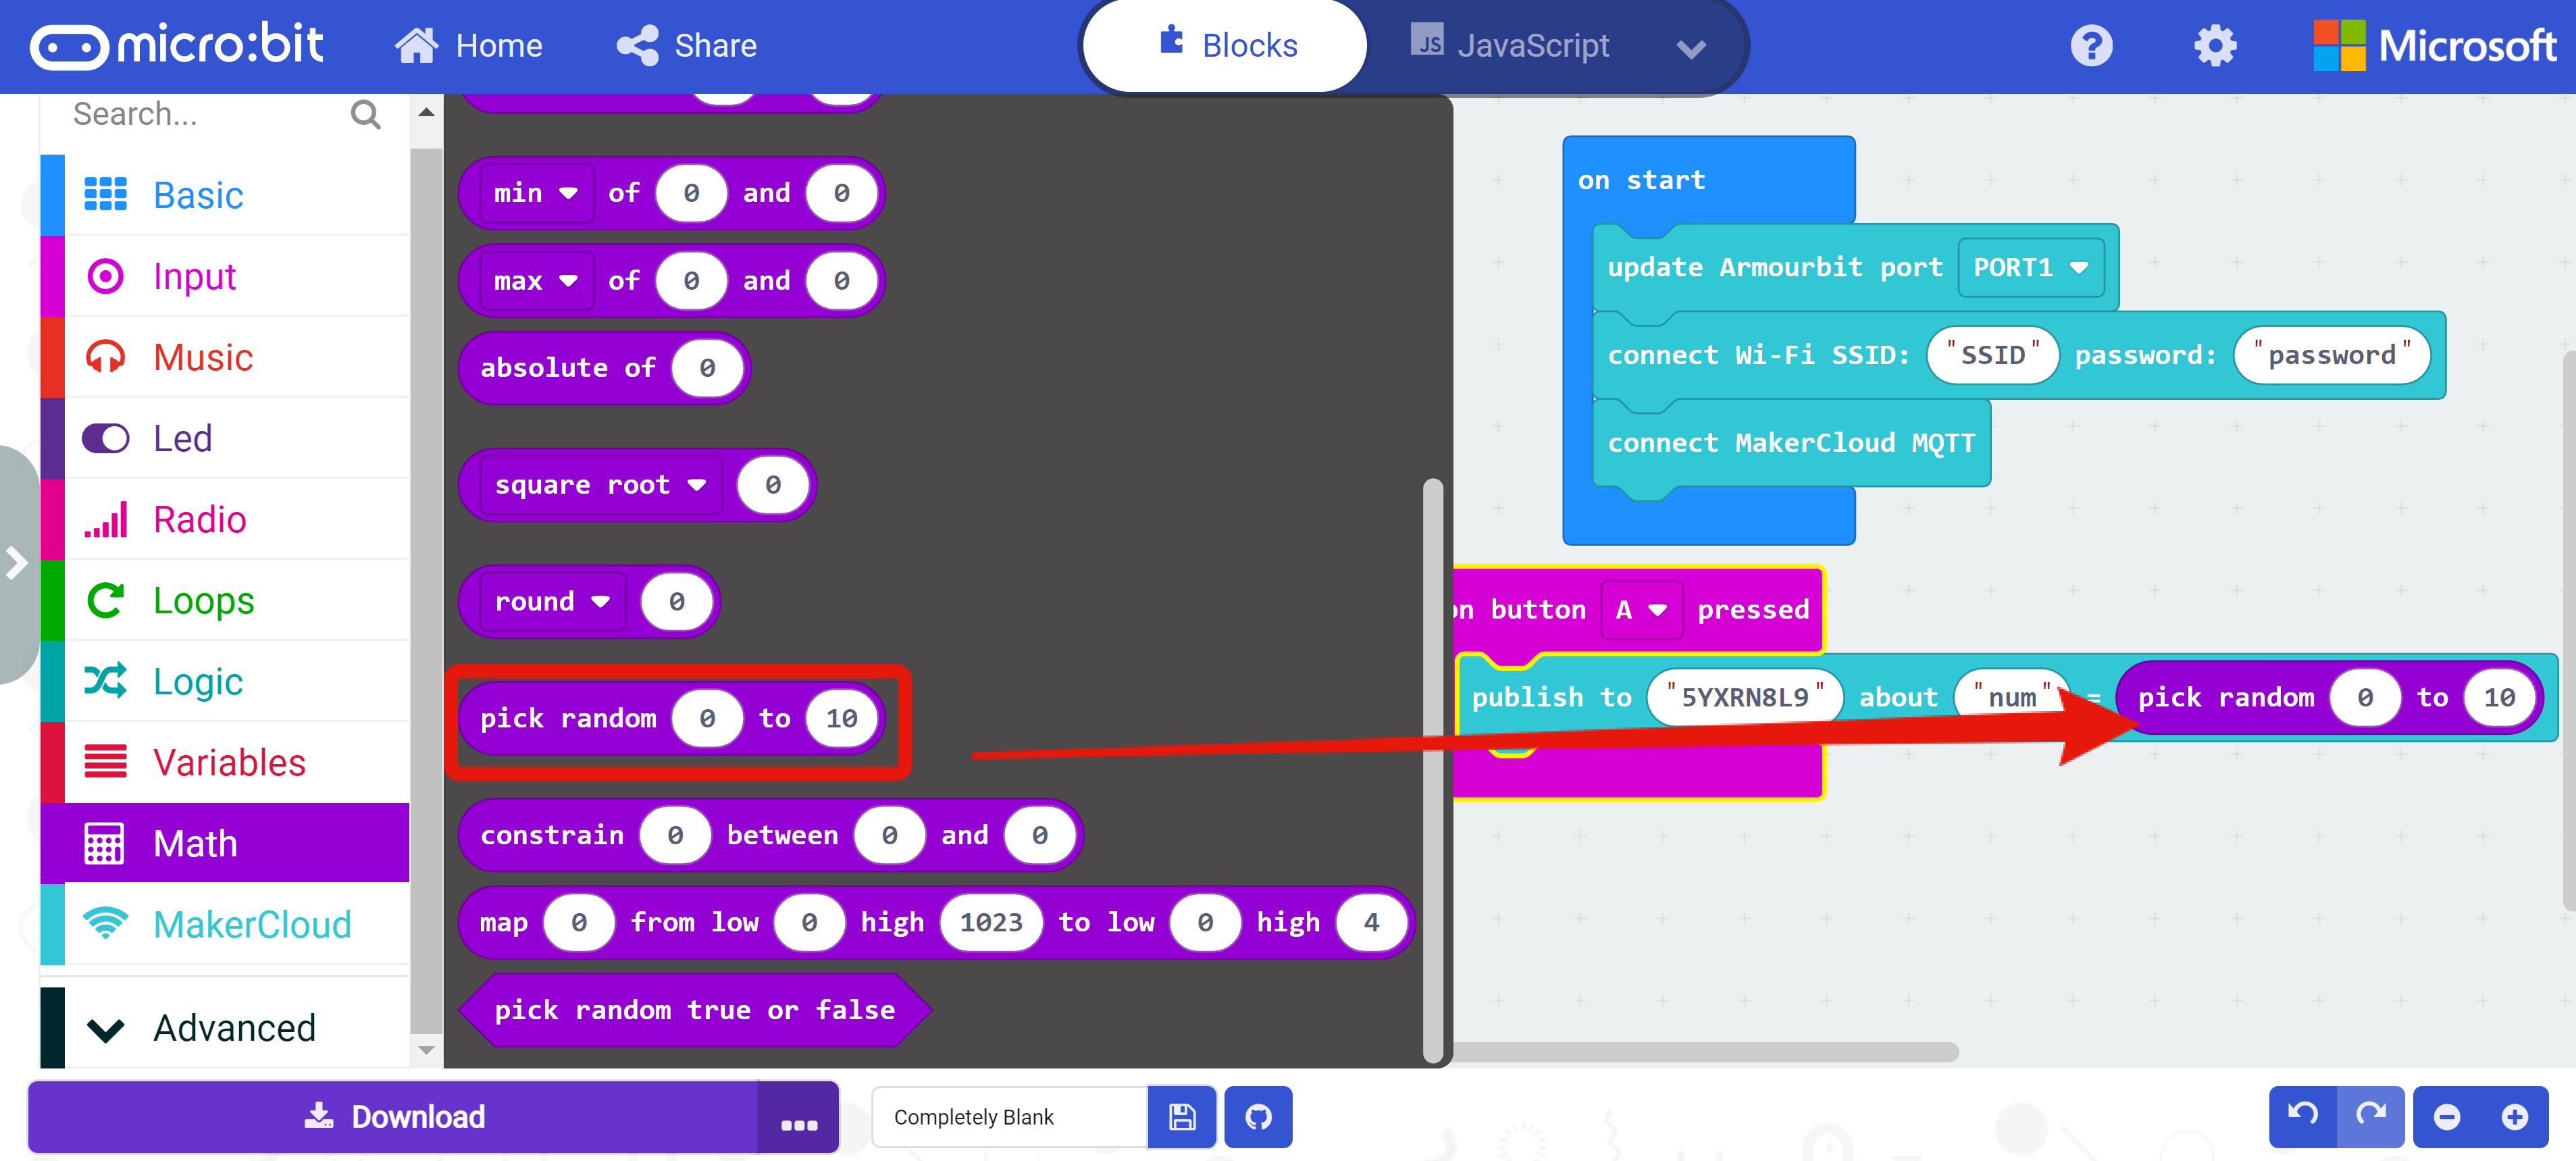
- When button "A" is pressed: Publish a key-value pair
Note: There are publish key text pair and publish key-value pair blocks available. Users can decdide which to use according to the type of data that they want to send. 5. Copy the topic name in MakerCloud
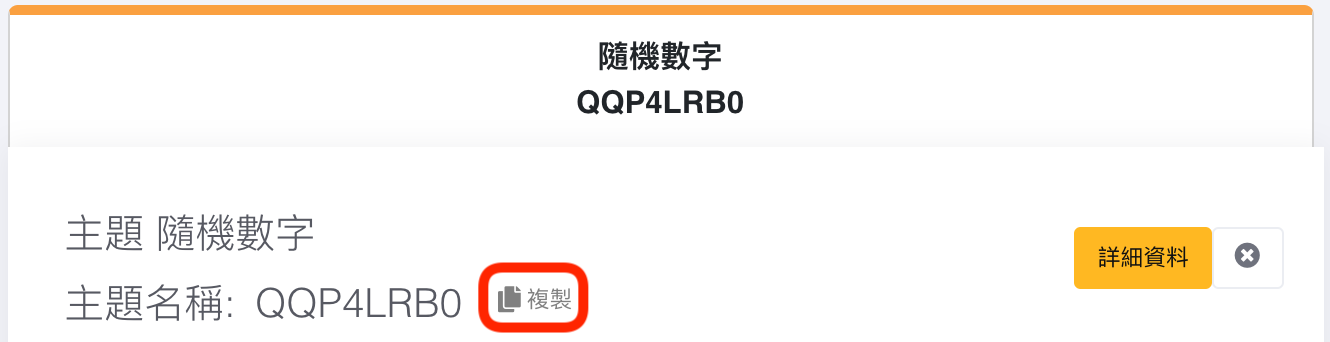
- Paste in the "topic" of the publish text message building block
- Enter "num" in "key" and add "random number 0-10" in 0
- Download the program to micro:bit
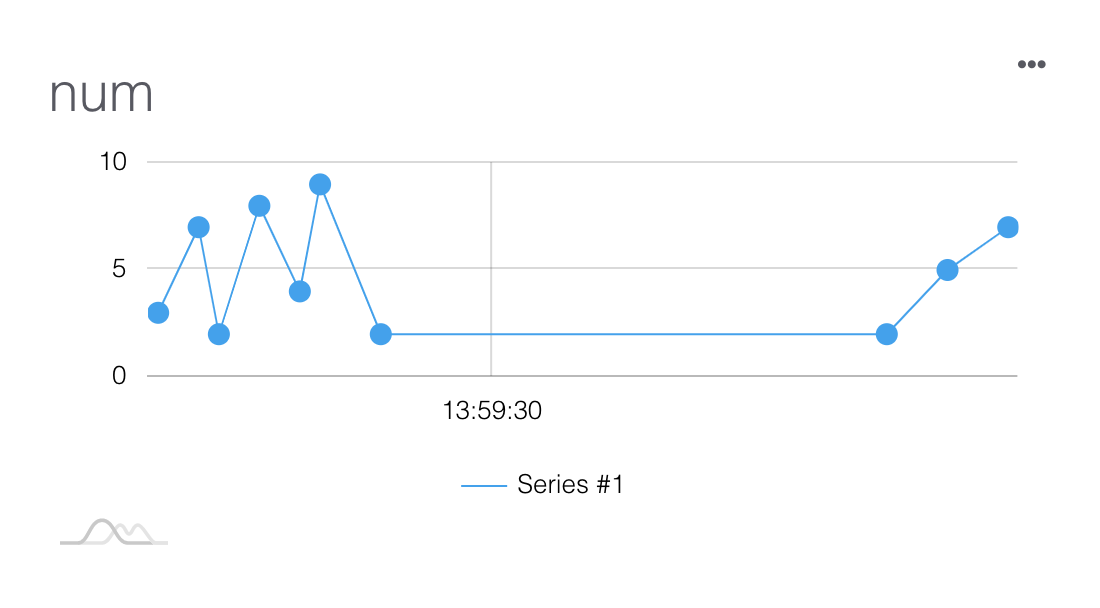
When finished, return to the project homepage of MakerCloud. After pressing A on your micro:bit, you should see the key-value or key-text messages from your micro:bit in the data viewer.
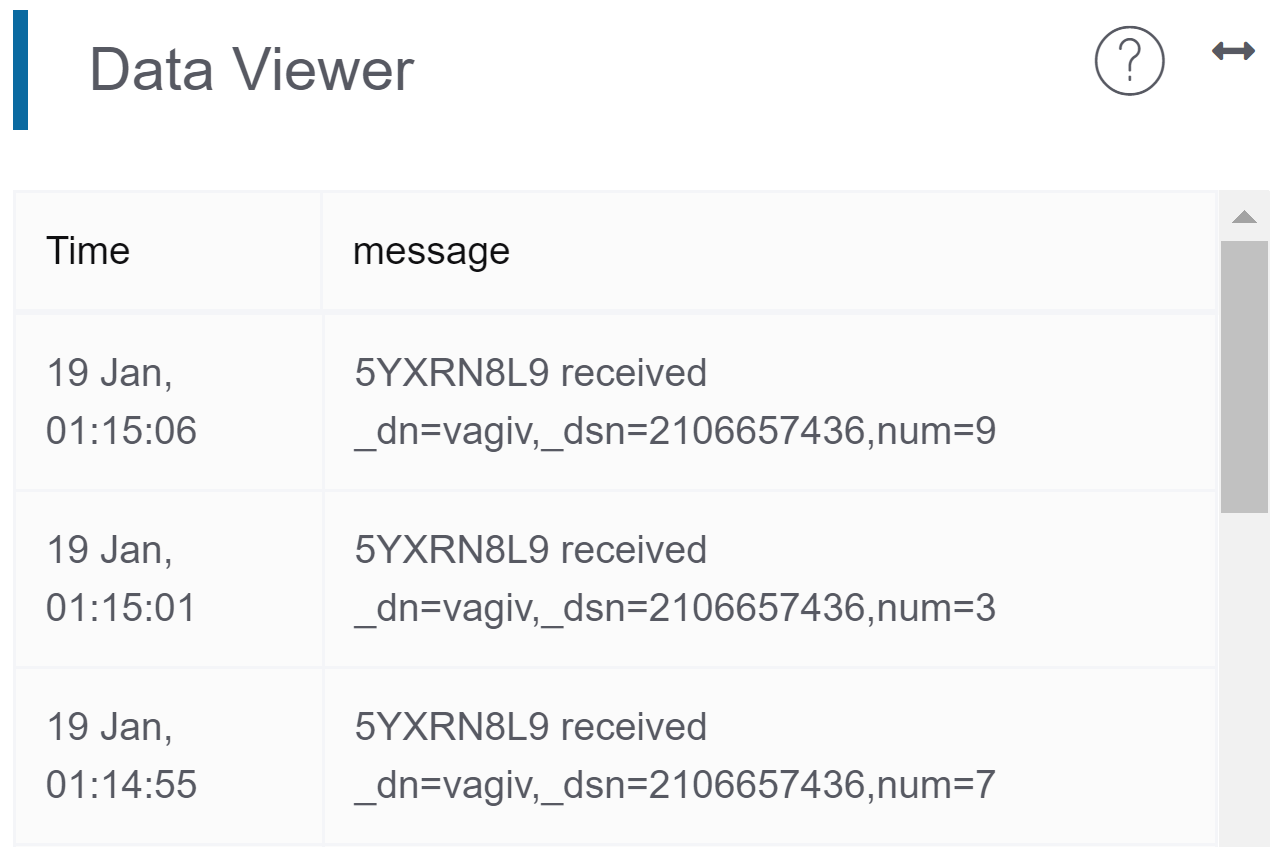
Then refresh the project home page and go to the chart home page.
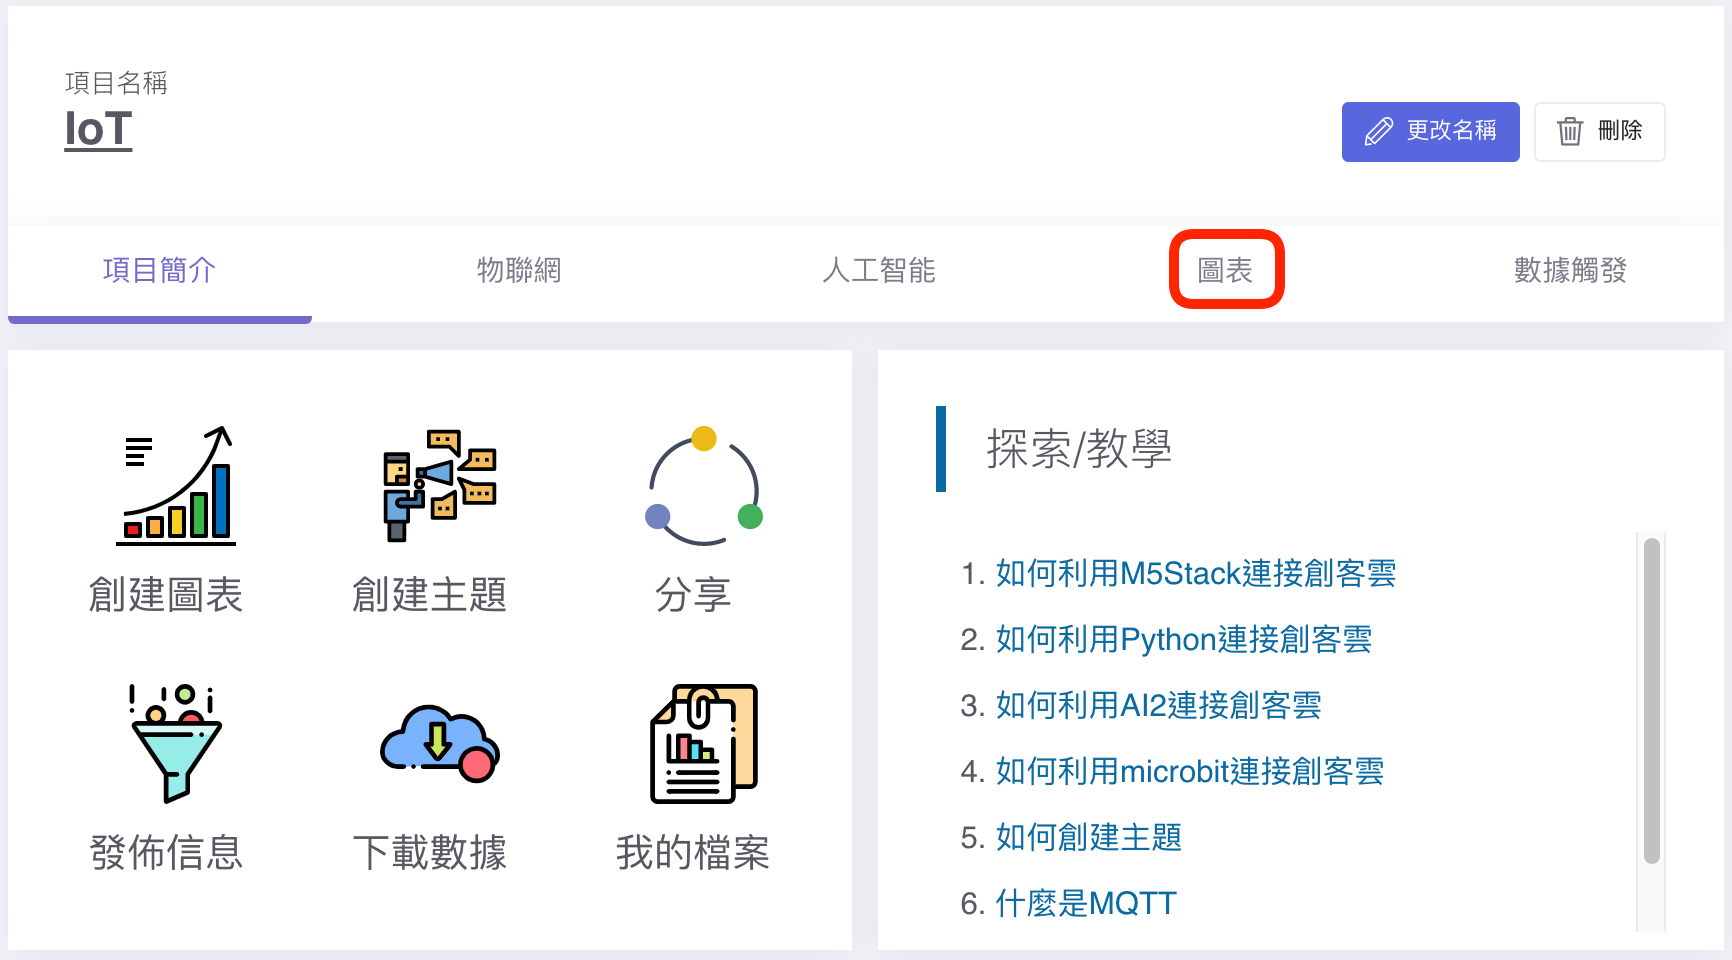
MakerCloud will automatically record the name of the key and create a chart for the key-value pair messages.