Exploring the Location Based Features of MakerCloud
Using MakerCloud's location features, users can record and monitor the locations of their topics, and view their topic locations and data through an automatically created map in MakerCloud.
Recording Topic Location
- Go to a project in MakerCloud, and enter the IoT homepage. Scroll down to the map.
- There you can update the topic by navigating around the map and clicking where you want your topic to be virtually located.
If you complete these steps with more than one topic on the same project, you can view all of their locations.
- Go to the "Chart" Tab in your Project. You will be able to see the topics, as well as any data that those topics receive.
- For example, you can see smart lamppost data when it is being published.
Exercise: Changing location from Microbit
Goal: To use the buttons on your micro:bit to update the location information on MakerCloud, and view the location changes in MakerCloud
Preparation on MakerCloud and with micro:bit
Create a project, topic and data type. Connect your micro:bit to the KittenWifi, Armourbit and battery pack.
Programming on MakeCode
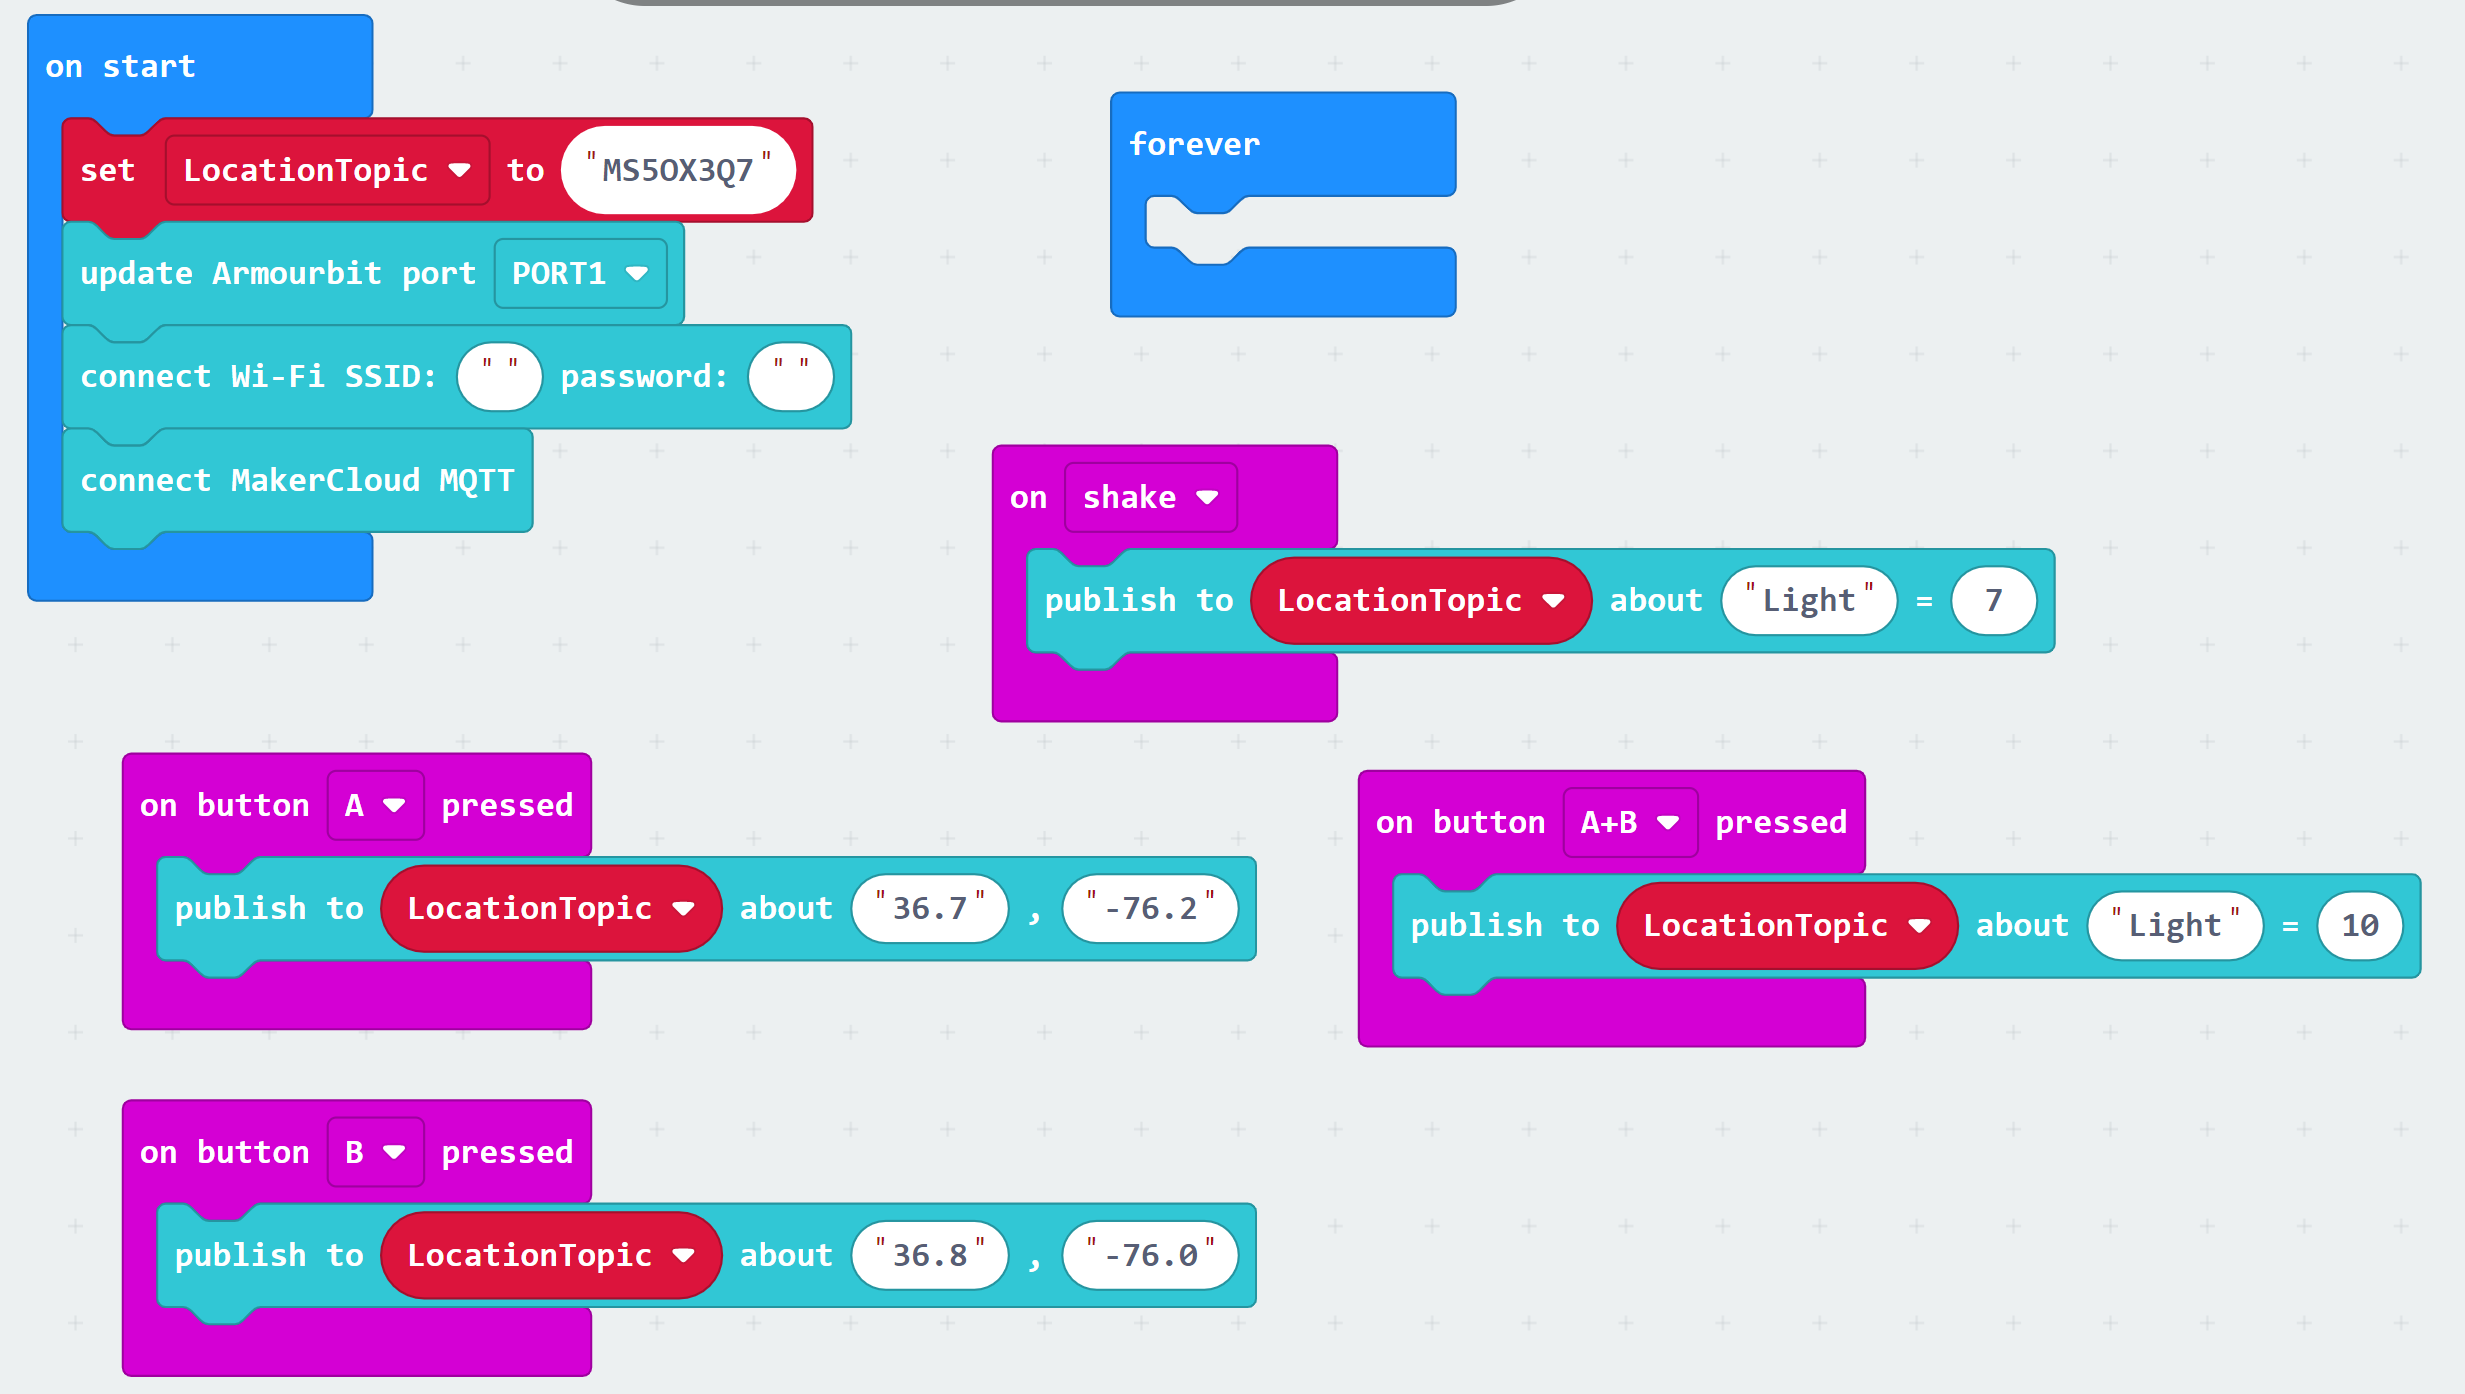
You are going to program your microbit to send three different locations to MakerCloud.
- First have the connection code
- Then create a variable that is called "LocationTopic".
- In the "On Start" block, set it to the name of your topic that you can copy in MakerCloud.
- Then, add four input blocks (when button A, button B,button A+B is pressed, and when the microbit is shook).
- In these input blocks, add two latitude/longitude location updates, and two publishing key-value message blocks to the data type you created.
Once you download the program to your micro:bit, you should see the location updating in the chart feature.