Using KOI to connect to MakerCloud
- KOI is a graphically programmable offline artificial intelligence module developed by Xiaomiao Technology for primary and secondary school students and STEM enthusiasts.
- The hardware includes lenses, microphones, speakers, IPS screen modules, Wi-Fi modules, etc.
- It has many capabilities, including but not limited to visual recognition, voice recognition, speech synthesis, and Internet of Things.
- WiFi functionality is integrated, allowing your artificial intelligence work to connect to an online cloud.
Connecting to micro:bit
This tutorial will use micro:bit to connect to KOI. On Kittenbot's official teaching website, there are detailed connection instructions: KOI official connection teaching
MakerCloud KOI Extension
While there are MQTT blocks in the KOI extension, they are difficult to use. In order to facilitate an easy connection to MakerCloud, we have written a special MakeCode extension for MakerCloud KOI.
Makecode for micro:bit
After connecting KOI to your micro:bit, start programming on MakeCode: https://makecode.microbit.org/
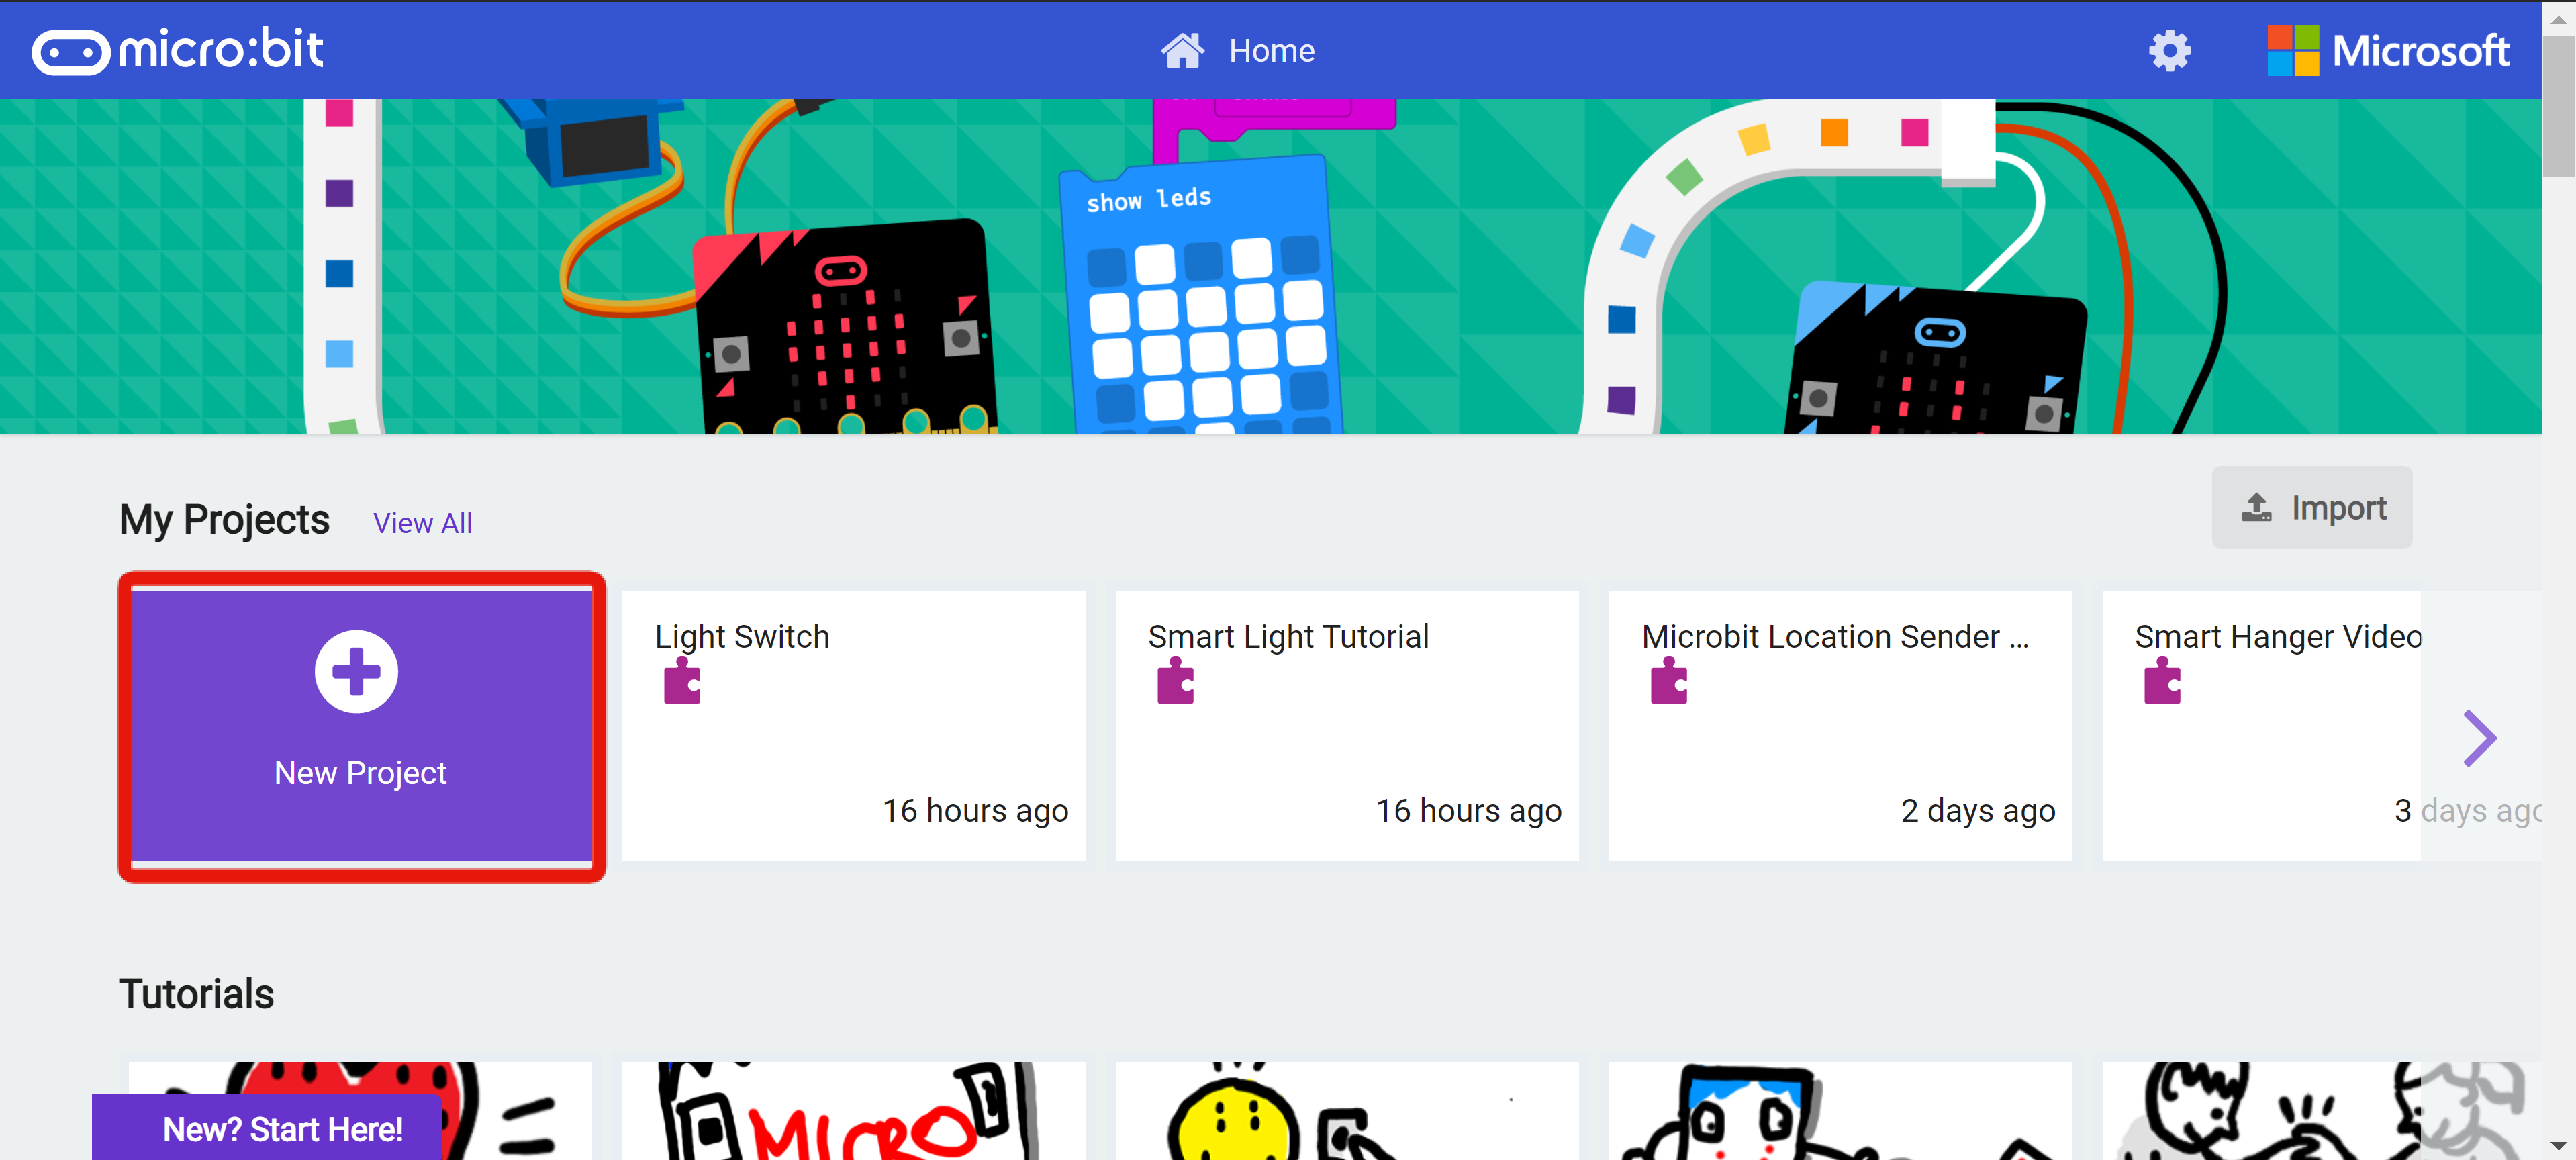
Create a new project
Add KOI extension
The MakerCloud KOI extension must be used with Kittenbot's KOI extension.
- Click "Advanced" -> "Extensions"
- Copy and paste the "KOI" extension link: https://github.com/KittenBot/pxt-koi
Add MakerCloud KOI Extension
After adding the KOI expansion, add the MakerCloud KOI expansion. This way, KOI can use its Wi-Fi capability to connect to MakerCloud via MQTT. 1. Click "Advanced" -> "Extensions" 2. Copy and paste the "Koi" extension link https://github.com/scaleinnotech/pxt-makercloud-koi
Connect to Wi-Fi and MakerCloud
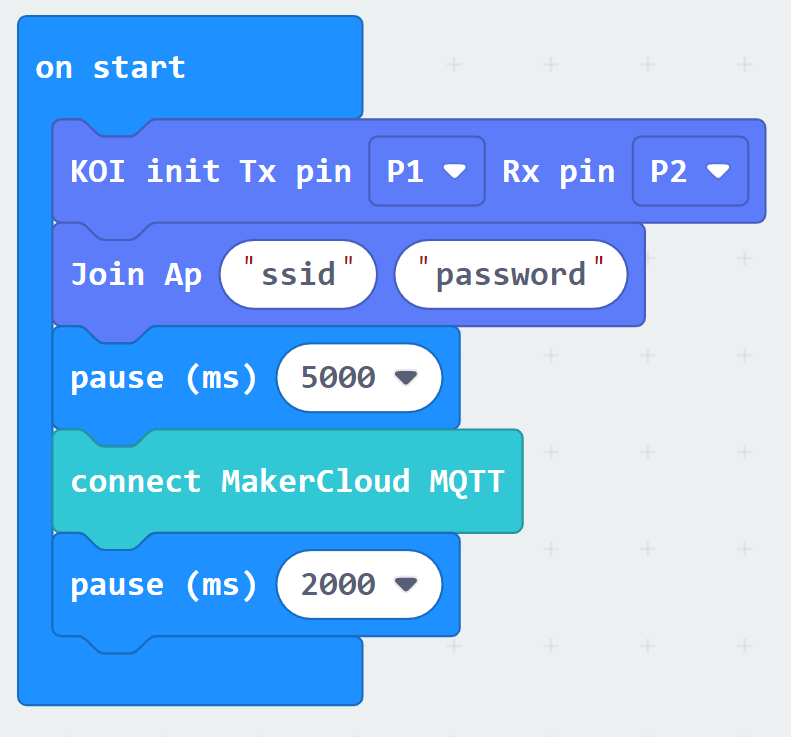
When started First, program KOI to connect to Wi-Fi and MakerCloud via MQTT when the micro:bit is started.
- Setting the pin
- Connect Wi-Fi settings: Enter SSID and password
- Pause for 5 seconds to ensure that the Wi-Fi connection is successful
- Connect to MakerCloud via MQTT
- Pause for 2 seconds to ensure that the MakerCloud-MQTT connection is successful
After completing the programming, download the program to your micro:bit. If you don’t know how to download code to micro:bit, refer to the following tutorial webpage: https://microbit.org/get-started/first-steps/set-up/
After successfully connecting to MakerCloud, the user can program the micro:bit to perform other MQTT commands. Note that you must first connect Wi-Fi and MakerCloud MQTT every time you program.