Using Arduino to connect to MakerCloud
Arduino is a popular micro-control board, and can be used with various types of sensors and motors. Recently, Arduino has introduced a model that can be connected to Wi-Fi. There are also other WiFi models that allow Arduino to connect to Wi-Fi. Therefore, Arduino can use Wi-Fi and different accessories to create IoT topics.
Arduino's MakerCloudMQTT Library
Although Arduino has a library that supports MQTT, there can be difficulties in its general use. In order to facilitate an easy connection to MakerCloud, we have written a library for MakerCloud called MakerCloudMQTT.
First, download the MakerCloud Arduino Library: MakerCloudMQTT Library
Install Arduino IDE
You must pre-install Arduino IDE before using MakerCloudMQTT
Users can download the installation program from the Arduino official website: Download Arduino IDE
After downloading, open the installer and follow the instructions to complete the installation.
Importing the MakerCloudMQTT Library
- Create a New Project File -> New
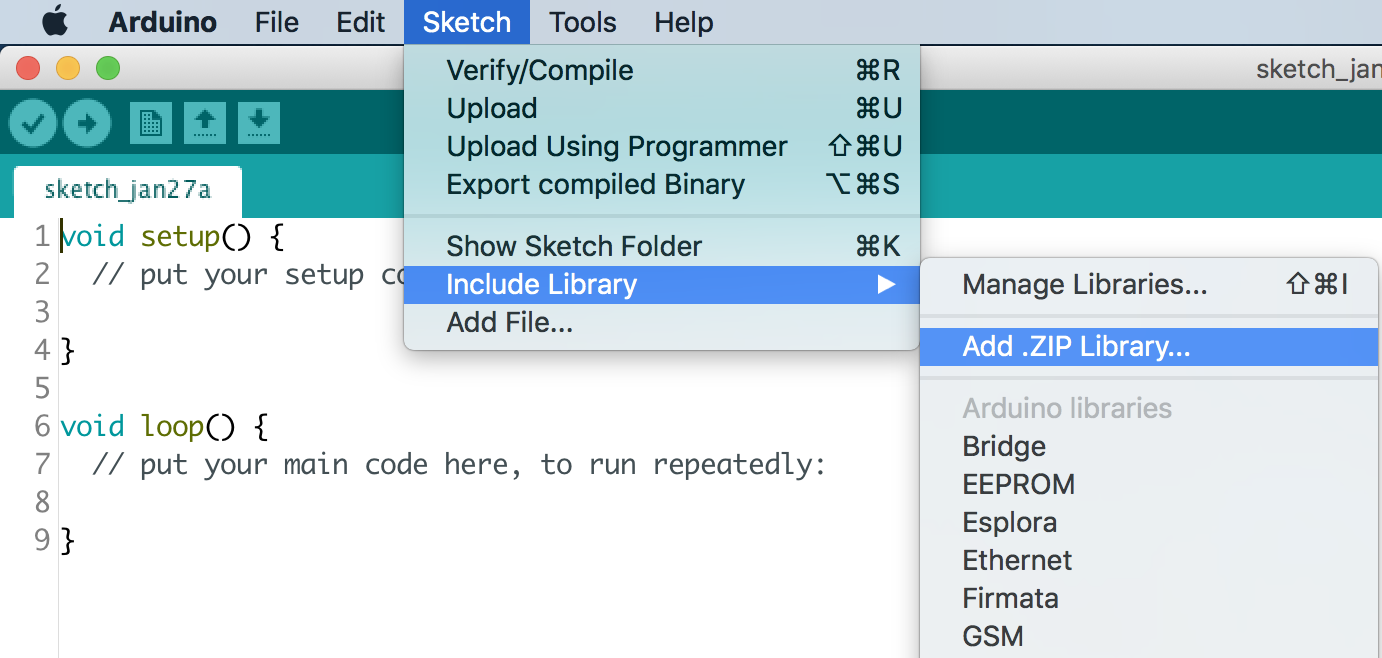
- Import MakerCloudMQTT Sketch -> Include Library -> Add .ZIP Library
Connecting to topic
There are many different ways to connect to Wi-Fi with Arduino. The following teaching will demonstrate using Arduino with the ESP-01 (ESP8266 module).
Arduino ESP-01 connect to Wi-Fi
Connection
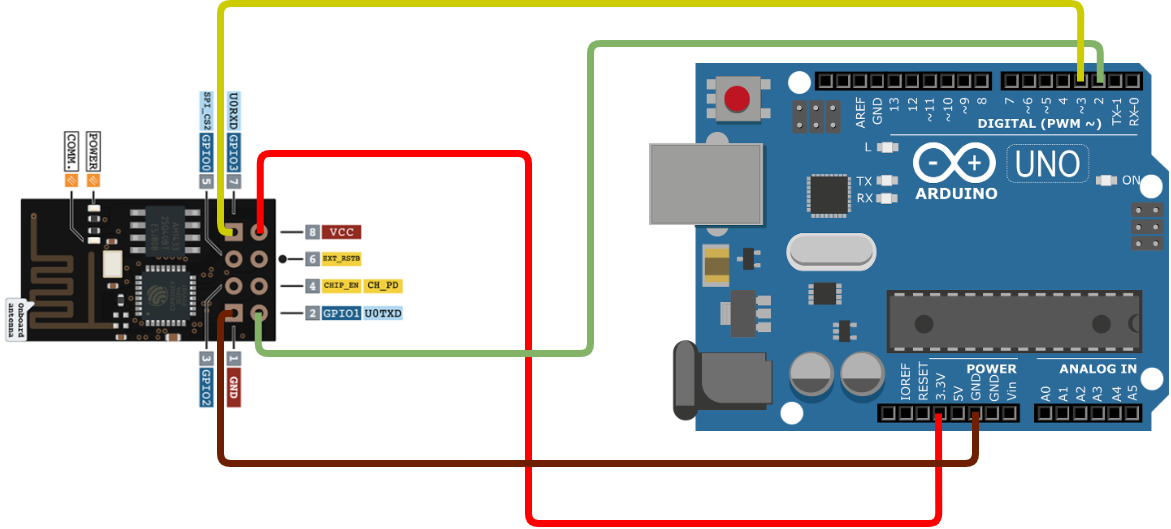
- ESP01 ------------> Arduino
- VCC --------------> 3.3v
- GND -------------> GND
- TX ----------------> P2
- RX ----------------> P3
After connecting the wires, use the following AT command to set the Baud Rate of ESP01 to 9600bps:
AT+UART_DEF=9600,8,1,0,0
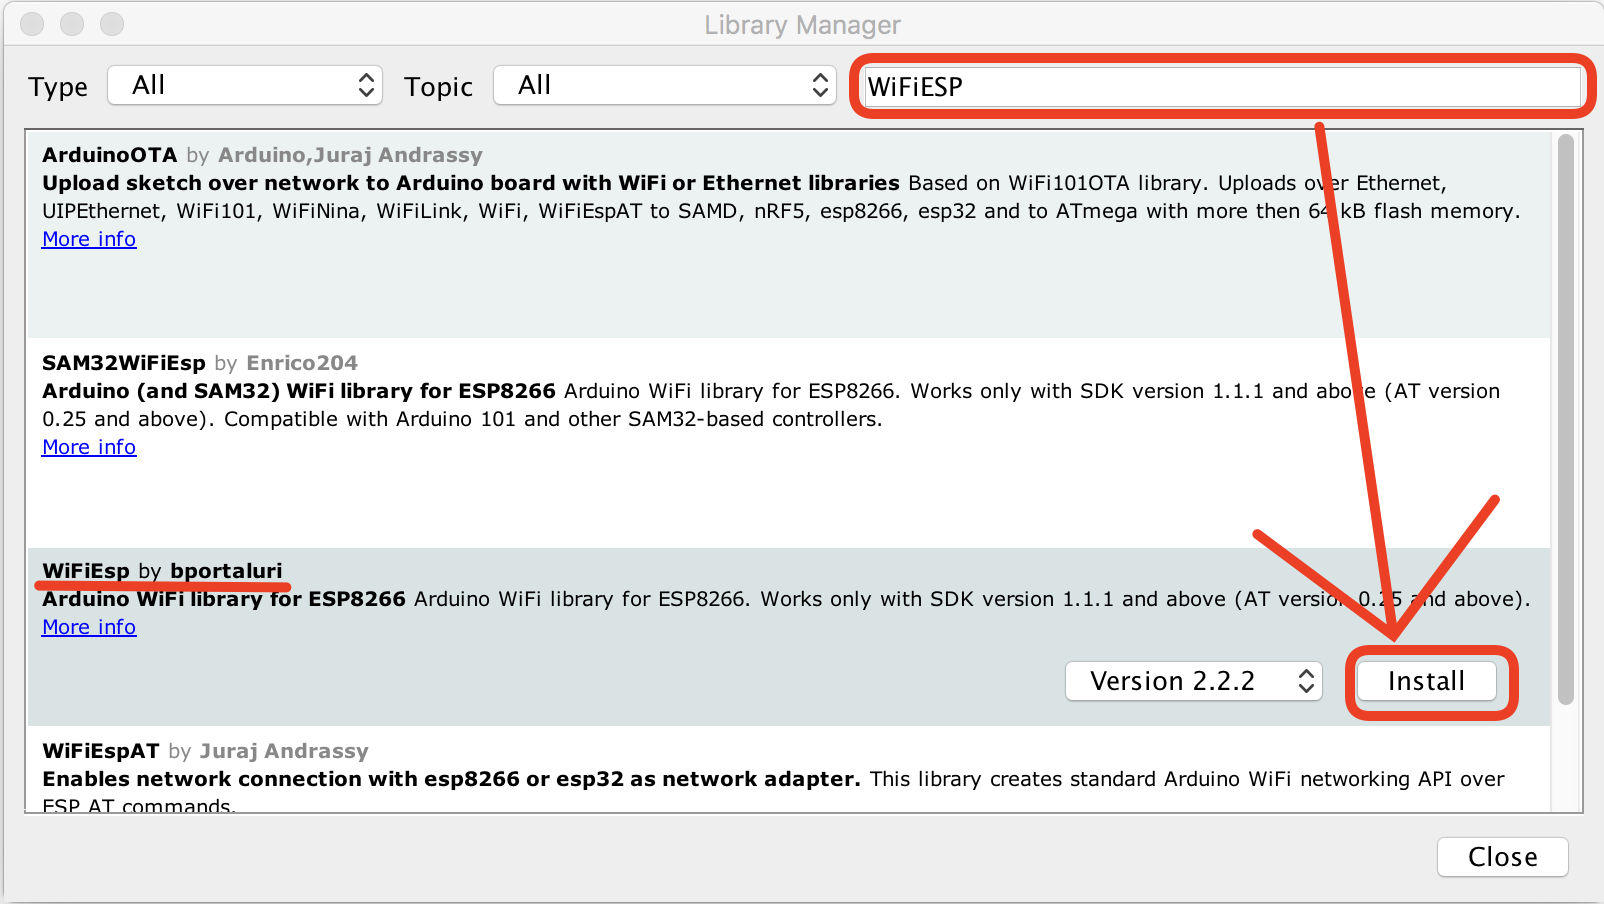
Install WiFiESP Library
EPS-01 needs to use WiFiESP Library to connect to WiFi.
- Sketch -> Include Library -> Manage Libraries
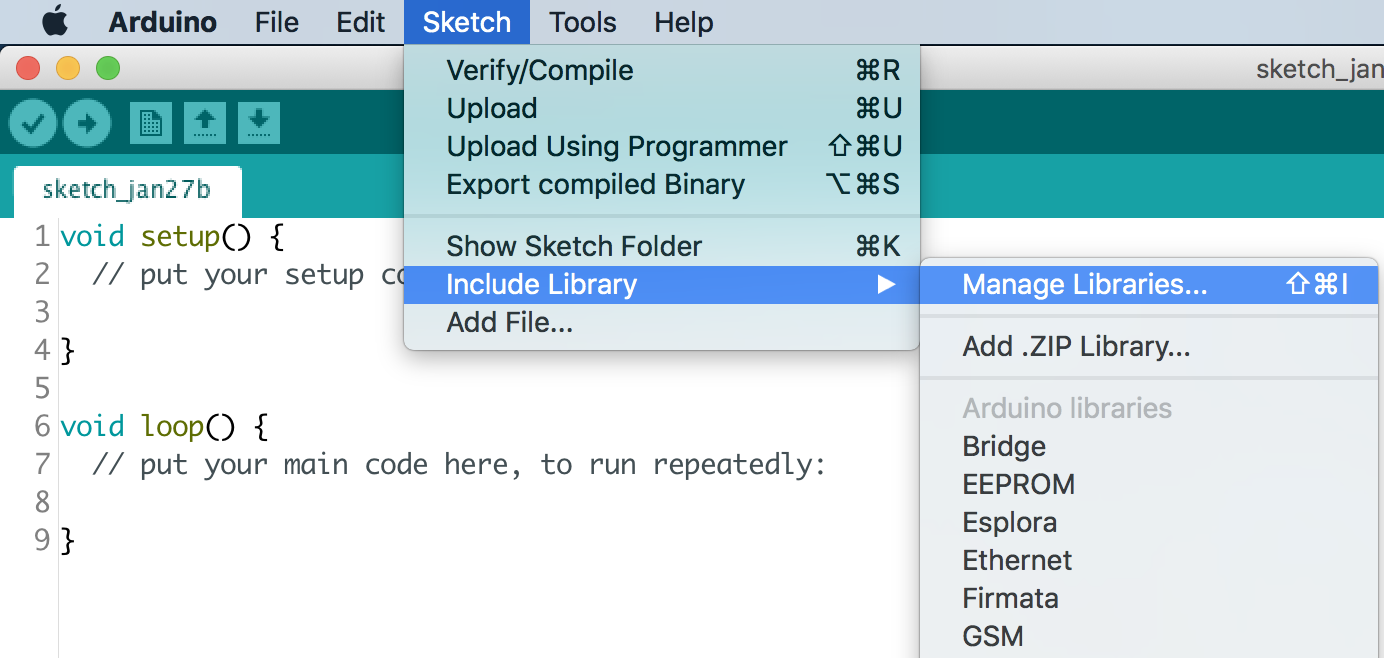
- Search and install "WiFiESP"
Connection Programming
#include <SoftwareSerial.h>
#include <WiFiEsp.h>
#include <MakerCloudMQTT.h>

// Change the credentials below, so your ESP8266 connects to your router
const char* ssid = "ssid";
const char* password = "password";


// Setting ESP8266 Serial Port(TX-P2, RX-P3)
SoftwareSerial ESP8266(2, 3);

// Initializes the espClient.
WiFiEspClient espClient;
MakerCloudMQTT MakerCloudClient(espClient);

// WiFi Status
int WiFi_Status = WL_IDLE_STATUS;

// This functions connects your ESP8266 to your router
void setup_wifi() {
  //Setting ESP8266 Baud Rate(9600bps)
  ESP8266.begin(9600);

  //Init ESP8266
  WiFi.init(&ESP8266);

  Serial.print("Processing WiFi Setting!\r\n");
  do {
    Serial.println("WiFi Connecting ...");
    WiFi_Status = WiFi.begin(ssid, password);
    delay(500);
  } while (WiFi_Status != WL_CONNECTED);

  Serial.println("WiFi Connected!");
  Serial.print("IP Address: ");
  Serial.println(WiFi.localIP());
  Serial.print("SSID: ");
  Serial.println(WiFi.SSID());
  Serial.println("WiFi Setting Done");
}

void setup() {
  Serial.begin(115200);

  // MakerCloudMQTT Configuration
  MakerCloudClient.setUsername("Max");
  // Enable to print extra log
  MakerCloudClient.setLog(true);

  // Connect ESP8266 to router
  setup_wifi();

  // Connect to MakerCloud
  MakerCloudClient.connect();
}
Universal Connection Instructions
In addition to the aforementioned Wi-Fi Library, MakerCloud also supports other different Wi-Fi libraries.
Connection programming (Another Example)
EthernetClient ethClient;
MakerCloudMQTT MakerCloudClient(ethClient);

// This function connects Wi-Fi
void setup_wifi() {

}

void setup() {
  Serial.begin(115200);

  // MakerCloudMQTT Configuration
  MakerCloudClient.setUsername("Max");
  // Enable to print extra log
  MakerCloudClient.setLog(true);

  // Connect Wi-Fi
  setup_wifi();

  // Connect to MakerCloud
  MakerCloudClient.connect();
}
MakerCloud/MQTT instructions
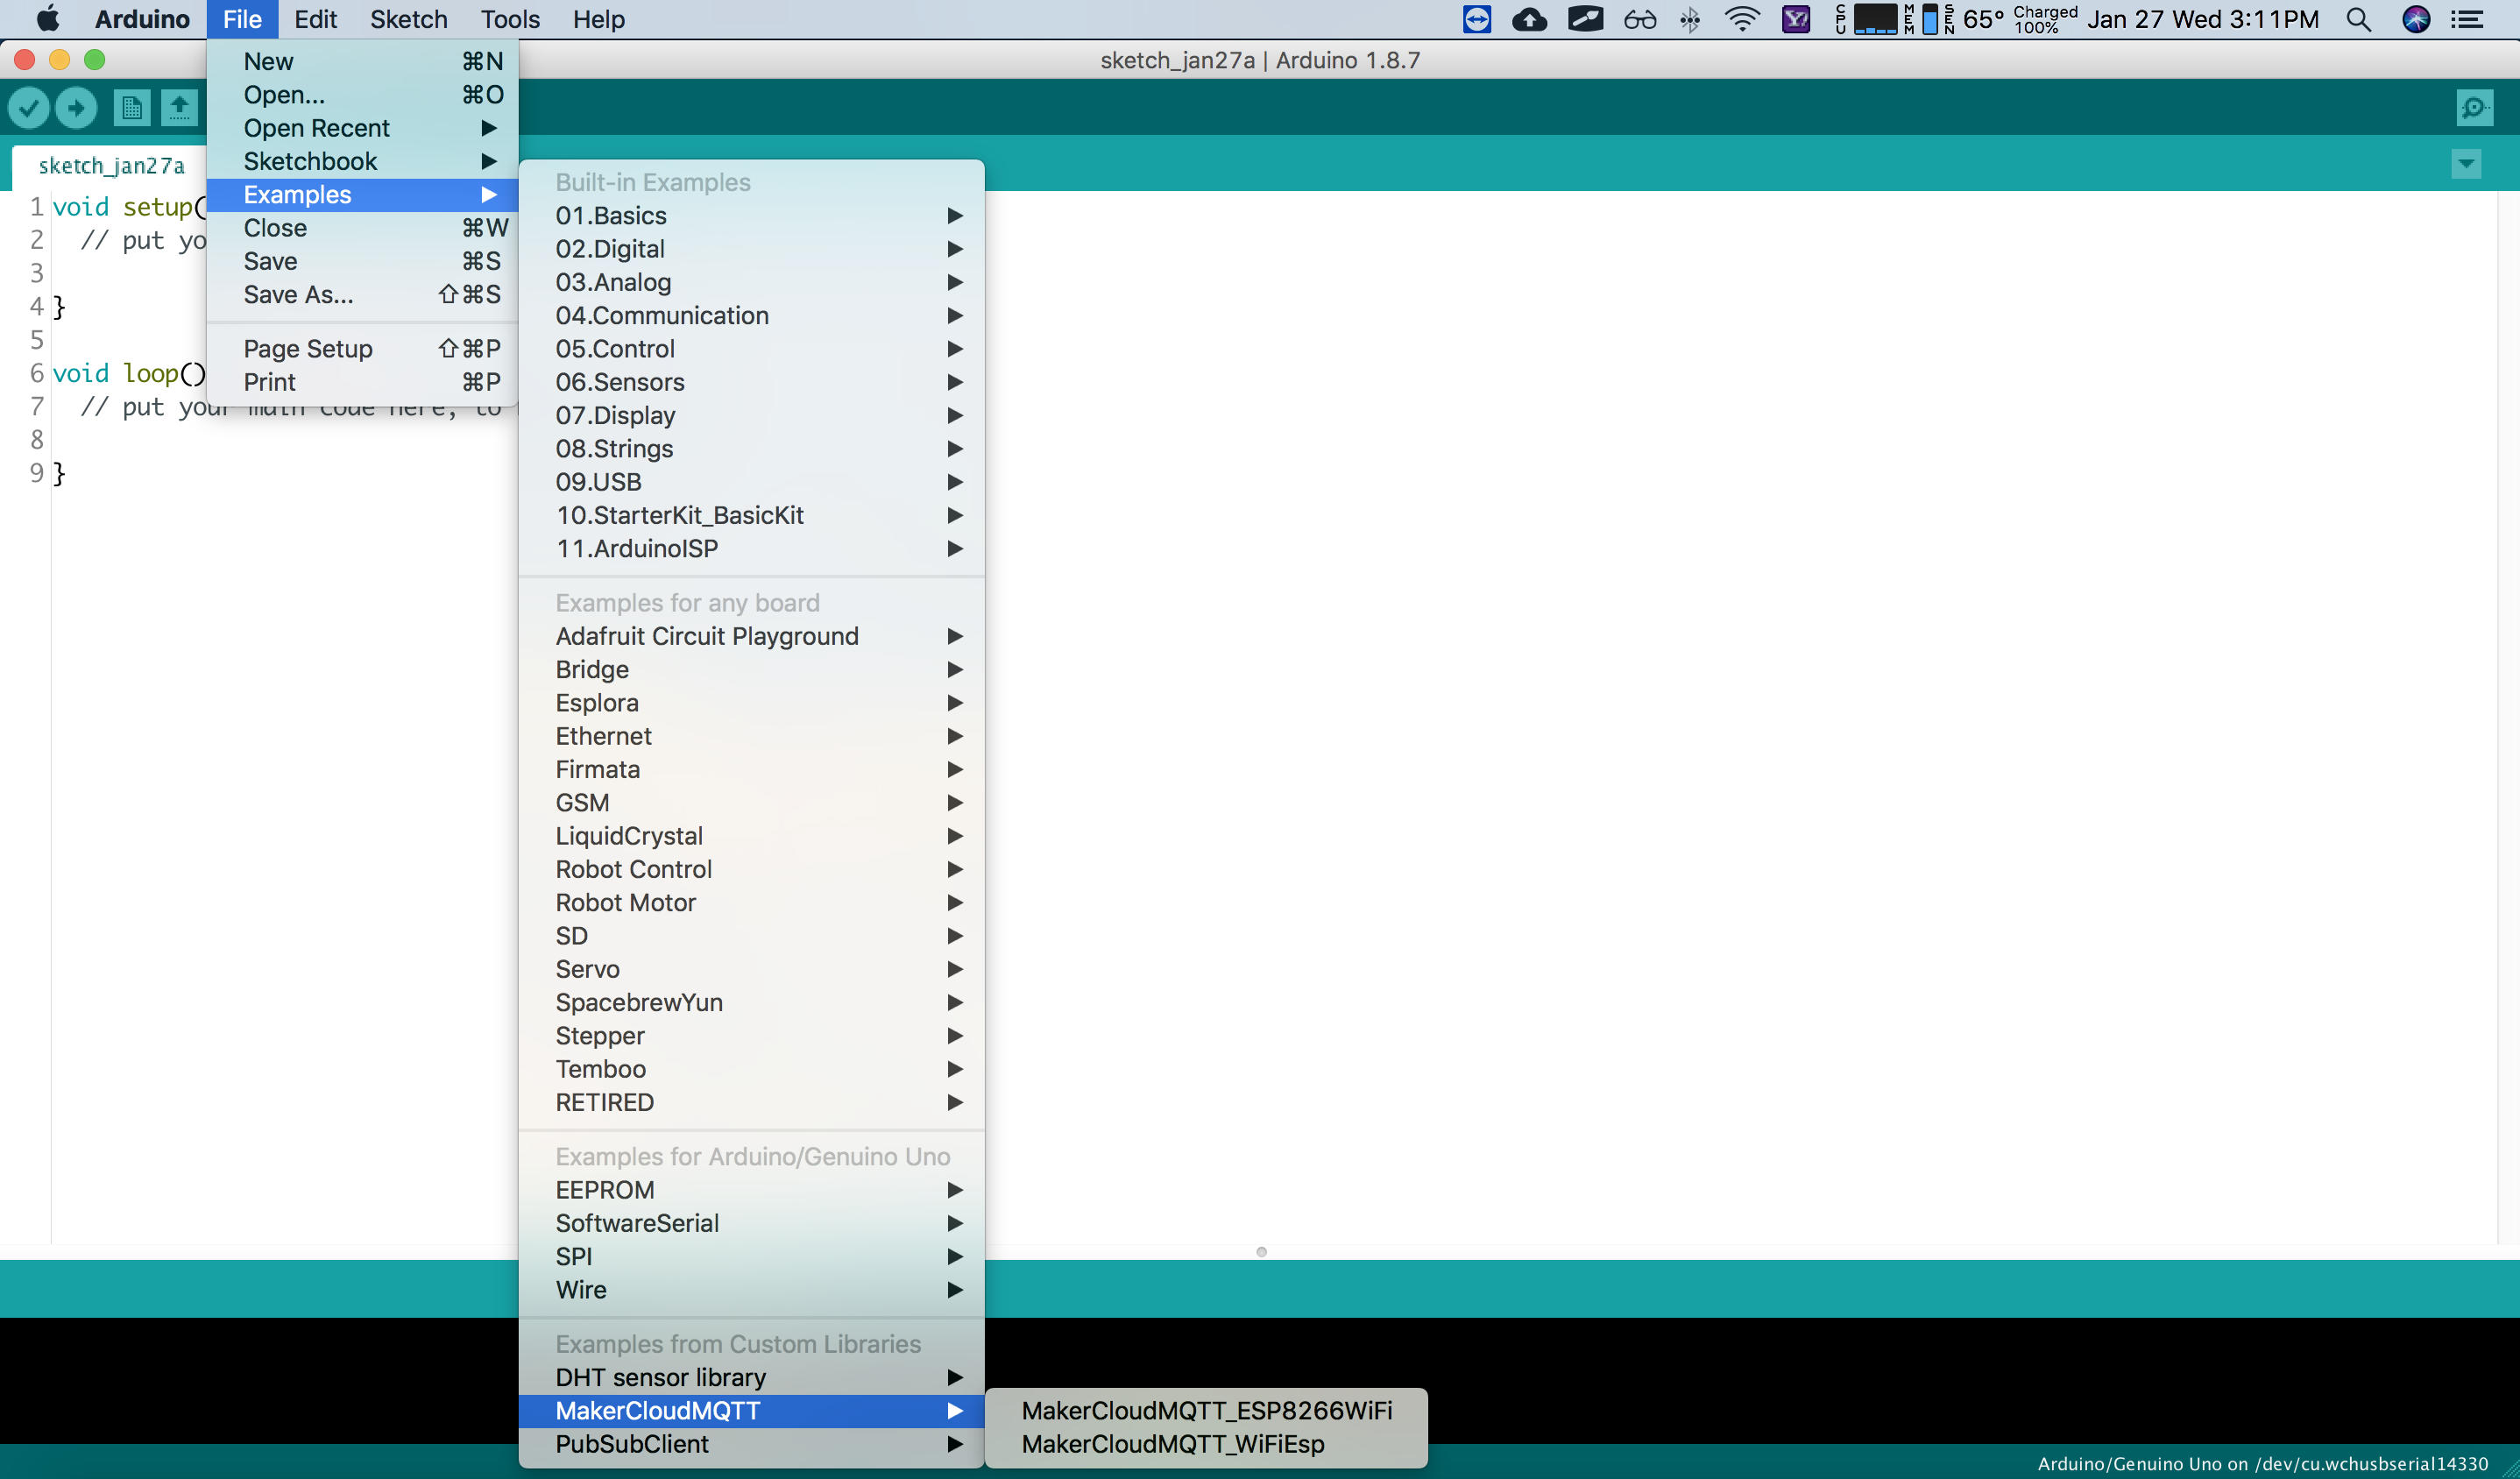
In "Examples from Custom Libraries", there are examples written by ESP8266WiFi and WiFiEsp Library. The examples include programming demonstrations for connection, publishing and subscription.